Monday, December 21, 2009

Snow time this weekend

Our car after we backed up from our drive way to opposite parking lot. Still lot to clean right !!!!
Our front yard view from our door while it is still snowing on saturday afternoon/evening time.
Our backyard, after it snowed all night. This shot is taken on saturday afternoon, while it still continues to snow.


Our Home at night after a little clean up of our driveway

Friday, December 11, 2009

First rays of sun after snow day

I wanted to capture the first rays of the sun on the first snow of the winter 2009. However I could not get a good shot but here is one which pictures my backyard. You can see that our whole backyard had a layer of snow on it, which then was melted mostly on the same day because of the sun. :) I like it.

Sunday, November 15, 2009

Traditional Mehendi design

This design is a traditional one, which people used to keep with the leaves of maide ka leave se. Now a days lot of new desins have come up but when you feel traditional or bored or want a quick design I feel going for this. With two infants at home maintaining a smart design for me is a lot of problem because we need to keep it on hands for few hours for it to look right and have nice color. Since I do not have lot of time or patience currently, I opted for simplest design as shown below:


Thursday, November 12, 2009

Monday, September 21, 2009

Indian art


This indian art is called "muggu" in telugu. There is a festival especially for this which comes in january time frame called "Sankranthi". Here is just a sample of it which we did at our home before, to play batukamma festival at our place.
The colors and design is done by my mother and I filled in colors in them. We used a wet chalk (sidewalk chalk pieces) to do the layout and filling colors.

DIY - BackSplash-3

Finally we got chance to finish our backsplash project after so many days of break. We got the grouting part very easy. I am planning to publish my lessons learned from this project so hopefully someother person who is willing to do doesnt have to repeat the same mistakes as we did.

We started around 9:30 in the night and it took almost 2 hours to finish 90% of the grouting before the grout we got is finished. So here it goes for grouting of tile:

first mix the grout as per the manufacturer's instructions. (Use the mixing tool for this, which will be effective, fast and easy to finish this part). Now take the trowel used for grouting with some grout mix and start spreading on the tiles in 45 degrees angle.


After you are done, leave it aside for 10 minutes and then take a damp sponge and start cleaning up the tiles one part at a time. clean the sponge, sqeeze extra water and then clean the tile again one time.

After cleaning with the sponge,according to our manufacturer's instructions we have to leave the grout for 3 days before sealing. Here is how our backsplash tiling with almost finished will look like. Since we used darker grout it actually dominated our color of the tiles which we choose, but it gave kind of a professional look I feel.


Wednesday, September 16, 2009

Ganapathi navratri celebrations

This picture is taken on first day of Ganapathi navratri celebrations this time. Starting on August 22nd - August 30th.

Tuesday, July 28, 2009

DIY - BackSplash-2

We bought some tiles and then got home and started looking at design which suits the background along with our countertop. We then settled on one of the tile sheet. (if you are lazy then select tile sheets, less work to do with them). We selected mosaic tile sheet with another stone type tile to go with it in between (for 3 lines).
We then started out our project by clearing out the area we want to add back splash. Before you start on anything add scotch blue tape in the area outside you want to add. for example, if you are adding it above granite countertop piece, then add blue tape on the edge and start of the wall and granite countertop piece. Then you select the thinset that goes with it. We used the adhesive instead of thinset. Adhesive goes well with glass tile or mosaic tile. Layout the structure you want on a plain surface. Cut the design in the way you want it.

Note: Consider the electrical outlets or any other hindrace in between (while laying out the design). Cut the design accordingly by considering all the above.


By using 3/16" trowel, we then spread out the adhesive on the wall. After the adhesive is spread out (for around 2 feet) we then use the angled side to make it even.


Note: while applying thinset/adhesive you should apply it by keeping trowel at an angle. if you apply it straight it wont stick fine. You will know this, by experience.


Now all you do is attach the tile onto the wall starting from down to top. press the whole tile/tile layout once.


Next step to do is grouting after 24 hours.

Saturday, July 25, 2009

DIY - BackSplash-1

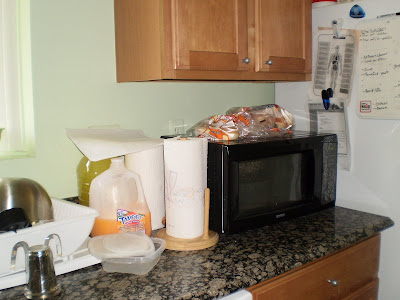
This is one medium size and budget home improvement project(HIP) which me and my husband decided to do by ourselves. We initially started reading out on how to do in diynetwork.com. Then we took pictures of the kitchen area where we are planning to add backsplash. We did not set our budget or anything. Which I believe everyone should do, to get a better idea. However we do keep track of how much we are spending on the project. one way good right.

We then measured the area and planned on how much we might need. Next step was to go to home improvement store and get required things. Before doing that, we need to first select on which tile is suitable with our granite countertop for back splash. So first time when we went to home improvement store we got some varieties of tiles to check if that suits with the granite countertop we have.

Initial stages of our project


More to come on this project ....

Thursday, July 09, 2009

My Puja Mandir


I respect all gods. Obviously I have soft corner for the indian hindu gods (because I am an indian and hindu too) .

Tuesday, July 07, 2009

Sunday, June 14, 2009

LinkWithin

Related Posts with Thumbnails